
How to assess shoe materials: designers' and buyers' guide
TL;DR:
- Most material problems can be identified through quick, simple tests before lab testing or bulk orders.
- Lab tests provide repeatable, standardized results that help compare materials, but field wear tests reveal real-world performance.
Three quick checks reveal most material problems before you spend a penny on lab time. Run a visual and construction inspection, a flex and grain-break test, and a small abrasion or water-spray check. If those pass, commission one targeted bench test matched to the use case: flex resistance for uppers, abrasion for outsoles, or breathability for performance linings. The three standards you need to know are SATRA (upper flex and abrasion methods), ISO (shoe testing standards), and ASTM (material test methods).
Minimum tools to have ready:
- A magnifier (10× loupe is sufficient)
- A stiff card or short dowel for flex testing
- A coarse cloth or fine sandpaper strip for abrasion rubs
- A small spray bottle filled with water
- A Dremel or rotary tool (for destructive teardown in a workshop or lab setting only)
Immediate action:
- Results acceptable → record the material grade, specify it in the purchase order, and submit samples for the relevant lab test (SATRA TM55 for flex, TM31 for abrasion)
- Results fail → change material or construction and retest before ordering bulk
Table of Contents
- How to assess shoe materials: lab tests versus wear tests
- What are the main shoe material families?
- Practical home and workshop tests you can run now
- How construction choices change what you need from a material
- How do you translate test results into specification decisions?
- What decision matrix does Ydauk use for material specification?
- Key takeaways
- The gap between a material’s test score and its real-world performance
- Ydauk’s technical guidance for material selection
- Standards, labs, and further reading
How to assess shoe materials: lab tests versus wear tests
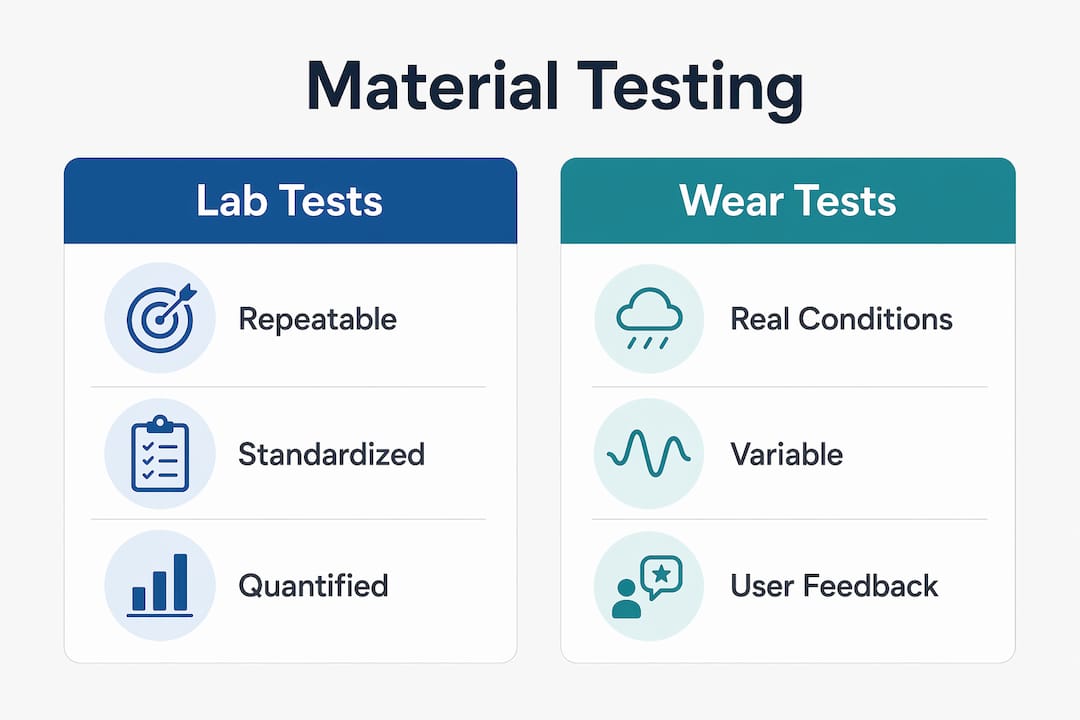
The distinction matters more than most buyers realise. Lab tests are controlled and repeatable; wear tests reflect real-world complexity that no rig can fully replicate.
What lab tests measure
Laboratory methods apply a fixed, standardised stress to a prepared sample and record a quantified result. That repeatability is their strength: you can compare suppliers, batches, and constructions on the same scale. Testing should be treated as predictive engineering, not merely a compliance checkbox. The most common upper material tests are flex resistance (SATRA TM55 / Bally flex method), abrasion (SATRA TM31 and TM173), and breathability (SATRA TM47, TM172, TM178). ISO 20344 covers broader shoe assembly.
| Test | What it measures | Typical result metric | What a pass means |
|---|---|---|---|
| SATRA TM55 (Bally flex) | Flex resistance of upper material | Cycles to visible cracking or finish failure | Upper survives repeated bend without surface breakdown |
| SATRA TM31 | Abrasion resistance (outsole/upper) | Mass loss in mg per set cycles | Material resists scuffing under defined load |
| SATRA TM173 | Finish abrasion (upper surface) | Grade or mass loss | Finish layer remains intact after rubbing |
| SATRA TM47 | Water vapour permeability | g/m²/24h | Lining allows adequate moisture transfer |
| SATRA TM148 | Adhesion of soling | N/mm peel force | Bond resists delamination under load |
| ISO 9237 | Air permeability of textile uppers | dm³/m²/s | Fabric allows sufficient airflow for comfort |
| ASTM F1976 | Impact attenuation (midsole) | Peak force in g | Foam absorbs impact within safe threshold |
Lab equipment typically includes a flexing rig, a Martindale or Taber abrasion machine, a water vapour tester (such as a Permetest instrument), and a tensile machine. For workshops without full lab access, a bench vice and marked card can substitute for the flex rig; a weighted coarse-cloth rub replicates light abrasion screening.
Pro Tip: A lab pass on SATRA TM55 does not guarantee field success. Real wear mixes sweat chemistry, variable gait, and UK weather in ways no rig replicates. Use lab results to screen and compare, then validate with a structured wear trial on a small user panel before bulk production.
Wear (field) tests
Field tests involve actual walking, either on a treadmill under controlled conditions or through a structured user panel over a defined period. They catch failure modes that lab rigs miss: adhesive creep under body heat, lining pilling from sock friction, and outsole edge wear on kerbs. The trade-off is time and variability. A wear trial long enough to be meaningful takes weeks; a lab flex test takes hours. Use both: lab tests to screen and compare, field tests to validate before sign-off.
When a destructive teardown is warranted, a rotary tool such as a Dremel lets you cut through the midsole stack or lasting board to inspect adhesive coverage, foam density, and internal bond quality. This is irreversible, so reserve it for final-stage QC or failure investigation, not routine screening.
Standards references
When writing a lab brief or purchase order, always cite the specific standard: SATRA TM55, ISO 20344, or the relevant ASTM method. Vague requests (“test for durability”) produce inconsistent results and make supplier comparisons meaningless.
What are the main shoe material families?
Material selection must match the design brief; there is no universally best option. A full-grain leather upper that excels in a dress shoe would be inappropriate for a performance trail runner. The table below maps the principal families against the dimensions that matter most for UK conditions.
| Material | Best for | Durability / abrasion | Breathability | Weight | Water resistance | Maintenance | Typical lifespan |
|---|---|---|---|---|---|---|---|
| Full-grain leather | Dress, heritage, work boots | High | Moderate | Medium–heavy | Good (with treatment) | Polish, condition regularly | 5–10+ years |
| Corrected-grain / split leather | Budget casual, work shoes | Moderate | Low–moderate | Medium | Moderate | Limited repair | 2–4 years |
| Suede / nubuck | Casual, fashion | Low–moderate | Moderate | Light–medium | Poor (untreated) | Brush, waterproof spray | 2–5 years |
| Textile / mesh (polyester, nylon) | Running, training, casual | Moderate | High | Light | Low–moderate | Machine wash (check label) | 1–3 years |
| PU synthetic leather | Fashion, budget casual | Moderate | Low | Light | Good | Wipe clean | 1–3 years |
| Canvas / natural fabric | Casual, espadrilles | Low–moderate | High | Light | Poor | Spot clean | 1–3 years |
| EVA foam (midsole) | Running, casual cushioning | Moderate (compresses) | N/A | Very light | N/A | Not repairable | 300–500 miles typical |
| Rubber (outsole) | All categories | High | N/A | Heavy | Excellent | Resoleable | 3 years |
| TPR / PU sole | Work, fashion, budget | Moderate | N/A | Medium | Good | Limited repair | 2–4 years |
Key sourcing and pitfall notes by family:
- Full-grain leather: always specify hide grade, finish type, and thickness in millimetres. Colour and texture must match across all hides in a batch. Inspect samples for marks, wrinkles, or uneven colour before ordering.
- Suede / nubuck: confirm hide type and weight; suede is typically made from thinner splits. Test that colour does not rub off or fade under a dry rub.
- PU synthetic leather: check what the backing fabric is (woven, knit, or non-woven) as this directly affects flex performance and adhesive compatibility. Request eco-certification test reports if the material is labelled sustainable.
- Textile / mesh: specify hole size, backing layer requirement, and fibre type. Test abrasion resistance, particularly for mesh types used in high-wear zones.
- EVA midsole: EVA is light and cushions well but compresses over time, losing cushioning faster than rubber components. Set foam density to match the intended comfort level; add rubber or TPU pods in high-wear areas to extend service life.
- Rubber outsole: ask for compound specifications including filler percentage, durometer rating, and abrasion test results. Verify performance in both hot and cold conditions, which matters for UK winters.
For a deeper look at how different sole types affect material choice and construction compatibility, Ydauk’s guide covers the key trade-offs.
Sustainability note: recycled and bio-based materials are increasingly available in the UK market. Before accepting an eco claim, request the relevant certificate (GRS for recycled content, Leather Working Group rating for leather) and the material composition data sheet. Ydauk’s guidance on sustainable shoe materials outlines what to verify and why the carbon difference is material.
Practical home and workshop tests you can run now
These checks cost almost nothing and take under thirty minutes. They are not a substitute for lab testing, but they will catch the majority of red flags before you commit to a bulk order.
Prepare your samples correctly first. Cut pieces at least 100mm × 50mm from the centre of the material, away from edges. If the material has a backing layer, test it as supplied (do not separate layers unless you are specifically testing the face material alone). Remove any protective film. Label each sample with supplier, batch, and date.
-
Visual inspection. Examine the grain, finish, and surface under a 10× loupe. Look for uneven finish thickness, pinholes, surface cracks, or colour inconsistency. On synthetic materials, check that the backing fabric is consistent and that there are no delamination bubbles. Flag any adhesive bleed or uneven seam lines on assembled uppers.
-
Flex and grain-break test. Fold the sample tightly over a stiff card so the face is on the outside. Hold for five seconds, release, and inspect. Genuine full-grain leather should show a fine, tight grain break with no cracking. A coarse or open break suggests a lower-grade split or corrected leather. On synthetics, look for white stress marks or surface crazing. Repeat 50 times in the same location; visible surface cracking within 50 flex cycles is a clear escalation trigger.
-
Small abrasion rub test. Rub a 50mm length of coarse cloth across the sample surface with moderate, consistent pressure for 20 strokes. Check for colour transfer to the cloth, finish removal, or surface fibre pilling. Severe colour transfer after 10 rubs indicates poor dye fixation or finish adhesion.
-
Water spray test. Spray a fine mist onto the sample from 30cm and observe for 60 seconds. Water should bead on treated leathers and water-resistant synthetics. Rapid absorption into an untreated leather or canvas is expected; the test confirms whether a claimed water-resistant finish is actually present.
-
Heel counter stiffness test. On an assembled upper or counter component, press the heel counter firmly inward with your thumb. It should resist deformation and spring back immediately. A counter that collapses easily or stays deformed will fail to support the heel in wear.
-
Seam and pull test. Grip the upper material on either side of a seam and pull firmly apart. Stitches should not skip, pull through, or show thread breakage. Check stitch density visually: fewer than 6 stitches per centimetre on a structural seam is worth querying with the factory.
Pro Tip: To simulate repeated bending on leather, flex the sample over a 10mm-diameter dowel rather than a flat card. The tighter radius accelerates finish stress and reveals grain-break problems that a flat fold misses. On synthetics, the same technique exposes backing delamination that looks fine under a flat bend.
When to escalate: surface cracking within 50 flex cycles, severe colour transfer after 10 rubs, heel counter collapse, or any seam failure under hand tension all indicate that lab testing is needed before approving the material.
How construction choices change what you need from a material
The same upper leather that performs well in a welted boot can fail rapidly in a cemented trainer, not because the leather is worse, but because the stress pattern is completely different.

Cemented (glued) construction bonds the upper directly to the midsole with adhesive. The bond line is the critical interface. Materials with heavy surface finishes, silicone release agents, or low-energy backing fabrics resist adhesive penetration and are prone to delamination. Before specifying a material for cemented construction, always check that the adhesive system is compatible with the upper’s backing and finish. Pre-treatment (roughing, priming) is often required and must be written into the spec.
Welted construction (Goodyear or similar) uses a welt strip stitched to the upper and insole, with the outsole then attached to the welt. The upper is stressed at the lasting margin rather than across the full bond area. This tolerates stiffer, thicker leathers well but demands consistent lasting-margin width and leather thickness to avoid stitching failures.
Stitched-through and Blake constructions stitch directly through the insole. The needle penetrates the upper, so materials with low tear strength or open weave structures are at risk of stitch pull-through under load.
Construction inspection checklist:
- Lasting line: check that the upper is pulled evenly with no puckering or gaps at the toe and heel
- Stitch density: verify stitches per centimetre against the spec; count at least three locations
- Visible glue lines: adhesive should not bleed beyond the bond area; excess glue on the upper surface indicates poor process control
- Midsole bonding: press the midsole-upper junction firmly; any movement or audible click suggests incomplete bonding
- Welt integrity: on welted shoes, run a fingernail along the welt seam; it should be tight and continuous with no gaps
Material consistency and bond strength at interfaces are often more important than single material test scores. A synthetic with excellent tensile strength can still delaminate at the seam if bonding is poor.
Pro Tip: When writing a spec sheet, always include the required adhesive type (polyurethane, neoprene, or water-based), the pre-treatment method, and the minimum peel strength in N/mm referenced to SATRA TM148. “Good adhesion” as a spec term is unenforceable and will be interpreted differently by every factory.
How do you translate test results into specification decisions?
Numbers from a lab report are only useful if you know what action they require. The diagnostic approach matters: interpret results to understand what the material and construction are doing, not simply whether a threshold was crossed.
Result-to-action mapping:
- Low abrasion resistance (high mass loss on TM31) → add a rubber toe cap or outsole reinforcement; consider a more abrasion-resistant upper material in high-wear zones
- Poor breathability (low g/m²/24h on TM47) → redesign ventilation zones, switch to a mesh or open-knit lining, or specify a moisture-wicking textile insert
- Finish cracking within low flex cycles → investigate finish thickness and adhesion parameters; excessive finish thickness causes early cracking even when the base leather structure is sound
- Weak adhesion peel (below spec on TM148) → review pre-treatment process and adhesive compatibility; do not accept the batch
- EVA compression set too high → increase foam density or switch to a polyurethane midsole for applications requiring longer cushioning life
Durability benchmarks by use case (UK conditions):
- Casual / fashion footwear: buyers generally expect 1–3 years of regular wear; materials need to pass moderate flex and abrasion thresholds
- Running / performance: midsole cushioning is the limiting factor; EVA midsoles typically show measurable compression after 300–500 miles of use; outsole rubber should pass high-cycle abrasion
- Work / safety footwear: governed by EN ISO 20345 in the UK; upper and sole materials must meet defined impact, compression, and slip-resistance thresholds
Buyers must align durability expectations with price point and material configuration. A budget fashion shoe specified with premium leather abrasion thresholds will either fail on cost or fail on quality when the supplier substitutes materials to hit the price.
When to commission full lab testing: if any home check triggers an escalation flag, or if the material is destined for safety, children’s, or performance footwear, submit samples to an accredited lab. A standard lab brief should specify: the test standard and method number, sample count (typically 5–10 per test), conditioning requirements (temperature and humidity, usually 20°C ± 2°C and 65% ± 4% RH per ISO standard conditions), and the acceptance threshold. SATRA in Kettering is the UK’s primary accredited footwear test laboratory and offers both standard and bespoke test programmes.
What decision matrix does Ydauk use for material specification?
Ydauk’s approach to material selection starts with the design brief, not the material catalogue. The matrix below maps four generic footwear categories to recommended material families and the tests worth commissioning.

| Category | Recommended upper | Recommended sole | Priority lab tests | Field validation |
|---|---|---|---|---|
| Premium casual | Full-grain leather or high-grade PU | Rubber or leather | TM55 flex, TM31 abrasion, TM148 adhesion | 4-week wear panel |
| Performance running | Knit / engineered mesh | EVA + rubber | TM47 breathability, ASTM F1976 impact, TM31 outsole abrasion | Treadmill + outdoor panel |
| Work / outdoor | Full-grain or corrected leather | Rubber (EN ISO 20345 compliant) | TM55, TM31, TM148, slip resistance | Structured field trial |
| Budget fashion | PU synthetic or canvas | TPR or PU | TM55 (reduced cycles), TM173 finish abrasion | Short wear panel or none |
Sample approval checklist:
- Receive pre-production samples (minimum 3 pairs or equivalent flat material panels)
- Run all six home checks (visual, flex, abrasion, water spray, heel counter, seam pull)
- Submit to lab for the priority tests listed in the matrix above
- Review lab report against specified thresholds; flag any result within 10% of the limit for re-test
- Conduct construction inspection: lasting line, stitch density, glue lines, midsole bond
- Approve, rework, or reject with written corrective action required
Writing a specification that holds up:
Replace vague terms with measurable ones. “High quality leather” becomes “full-grain bovine leather, minimum 1.2mm finished thickness, LWG silver-rated tannery, flex resistance minimum 50,000 cycles to SATRA TM55 without cracking.” “Durable sole” becomes “rubber outsole, minimum abrasion resistance 150mg mass loss to SATRA TM31.” Every term a factory can interpret differently is a term they will interpret to their advantage.
For energy-efficient midsole selection, Ydauk prioritises foam density and rebound characteristics alongside compression set. A foam that cushions well but compresses rapidly fails the energy-return brief even if it passes standard impact tests.
Pro Tip: When balancing comfort and durability in midsole foam, specify both the initial hardness (Shore A) and the compression set after 72 hours at elevated temperature. A foam that feels perfect on day one but retains deformation after compression is not a comfort material; it is a liability.
For guidance on comfortable shoe materials and how they interact with foot health, Ydauk’s resource covers the practical trade-offs designers face.
Key takeaways
Effective shoe material assessment combines three rapid home checks with at least one targeted lab test referenced to SATRA, ISO, or ASTM standards, then maps results to specific corrective actions rather than treating them as binary pass or fail.
| Point | Details |
|---|---|
| Three checks first | Visual inspection, flex/grain-break, and abrasion/water spray catch most red flags before lab costs are incurred. |
| Name the standard | Always cite the specific test method (e.g. SATRA TM55, ISO 20344) in purchase orders and lab briefs to ensure comparable results. |
| Escalation thresholds | Surface cracking within 50 flex cycles or severe colour transfer after 10 rubs are clear triggers for full lab testing. |
| Construction changes the brief | Cemented, welted, and stitched builds stress materials differently; specify adhesive type and peel strength (SATRA TM148) for every cemented construction. |
| Ydauk’s approach | Ydauk maps material families to use cases using a decision matrix that prioritises foam density, rebound, and energy return alongside standard durability thresholds. |
The gap between a material’s test score and its real-world performance
Most material failures in footwear are not material failures at all. They are specification failures: the wrong material for the construction method, or a test threshold that looked fine on paper but was never matched to the actual use case.
The grain-break test is a good example of where professional instinct diverges from common practice. Many buyers still rely on smell or cosmetic finish to judge leather quality. Professionals prefer the grain-break examination because it reveals the actual fibre structure, not the surface treatment. A heavily corrected leather can look and smell identical to full-grain on the shelf; the grain break exposes the difference in seconds.
The other pattern worth flagging is the over-reliance on a single test score. A synthetic upper with excellent tensile strength can still delaminate at the seam if the backing fabric is inconsistent or the adhesive system is mismatched. Bond strength at interfaces tends to be the actual failure point, not the bulk material. That is why the construction inspection checklist matters as much as the lab report.
For UK buyers specifically, the climate variable is underweighted. Wet-cold conditions accelerate adhesive creep and outsole hardening in ways that a standard lab test conducted at 20°C does not capture. If the shoe is destined for outdoor or work use in the UK, request cold-flex testing and wet-slip resistance as part of the lab brief.
Ydauk’s technical guidance for material selection
Choosing the right material is one decision. Knowing how to test it, specify it, and build it correctly is another. Ydauk offers technical guidance on material assessment for UK footwear designers and buyers: performance mapping against UK climate conditions, lab test coordination with accredited facilities including SATRA, and specification writing that replaces vague quality terms with enforceable thresholds.
Whether you are approving a new supplier’s leather, screening a synthetic upper for a performance brief, or trying to understand why a previous season’s midsole compressed too quickly, Ydauk’s team can translate lab numbers into product decisions. Visit the YDA technology page to see how Ydauk’s design and performance framework applies to material selection, or get in touch to submit a technical brief and discuss sample testing.
Standards, labs, and further reading
Primary standards to consult:
- SATRA TM55: flex resistance of upper materials (Bally flex method); the standard reference for upper cracking and finish failure
- SATRA TM31 / TM173: abrasion resistance of outsoles and upper finishes respectively
- SATRA TM47 / TM172 / TM178: water vapour permeability and breathability of uppers and linings
- SATRA TM148: adhesion of soling materials; essential for cemented constructions
- ISO 20344 / 20345: test methods for footwear and safety footwear; ISO 20345 is the UK/EU safety footwear standard
- ISO 9237: air permeability of textile uppers; used in academic and commercial textile testing
- ASTM F1976: impact attenuation of athletic footwear; the standard reference for midsole cushioning performance
Commissioning a lab test: what to ask and how many samples to send:
When submitting to an accredited lab such as SATRA (Kettering, UK), include: the specific test standard and method number, the acceptance threshold, conditioning requirements (standard is 20°C ± 2°C, 65% ± 4% RH), and the number of samples. Most standard tests require 5 samples minimum; destructive tests such as adhesion peel typically require 10. Ask the lab to return tested samples where possible so you can inspect failure modes directly.
Further reading and resources:
- Shoemakers Academy material selection guide: practical designer-level guidance on matching materials to briefs
- The Footwear Edge: upper material testing: detailed technical overview of standard tests and failure modes
- TRISTAR sourcing guide to shoe materials: practical sourcing notes on ten key material families including build tips and supplier questions
- Sneaker quality checks: retail-level home checks useful for buyers and QC staff
- Ydauk: types of shoe materials and comfort: background on material families and their comfort characteristics
- Ydauk: eco-friendly footwear and sustainability: guidance on verifying sustainable material claims
- Sneaker brand comparisons and retail context: useful for understanding how material choices translate to consumer perception across price tiers