
How to find your shoe size accurately at home
Stand on a hard floor in the socks you’ll wear with the shoes, place your full weight on both feet, and measure from your heel to the tip of your longest toe in centimetres. Do this for both feet and always work from the larger of the two measurements. Match that number against a size chart alongside a quick width check, and you’ll have a genuinely reliable figure to shop from. Done properly, this home method lands you within about half a size of what a professional Brannock device would tell you, which is close enough for the vast majority of purchases.
- Stand, don’t sit, and measure in the evening when feet are at their largest
- Measure heel to the absolute tip of your longest toe, not just your big toe
- Measure both feet separately and use whichever number is bigger
- Check width across the ball of the foot too, since length alone doesn’t guarantee fit
Key Takeaways
Accurate shoe sizing comes from measuring both feet standing up in the evening, using the larger length plus a width check, and confirming against brand-specific charts.
| Point | Details |
|---|---|
| Measure standing, not seated | Stand with full weight on a hard floor, ideally in the evening when feet are largest. |
| Use the larger foot | Feet often differ by a few millimetres; always size to the bigger measurement. |
| Confirm your longest toe | Check whether your second toe extends past your big toe before marking the tip. |
| Check width and arch length | A long arch or wide forefoot should sometimes override a straightforward heel-to-toe reading. |
| Re-check brand charts every time | Lasts vary between brands, so convert your centimetre measurement against each brand’s own chart. |
Table of Contents
- How to measure your shoe size with the paper tracing method
- The wall-baseline method for a faster single-person measurement
- Measuring foot width and understanding arch length
- Converting your measurement to UK, EU, and US shoe sizes
- How do you check if new shoes actually fit?
- Foot health expertise behind this shoe sizing guide
- Why the longest toe isn’t always your big toe
- Does your shoe size change with age, pregnancy, or swelling?
- Why shoe sizes differ so much between brands
- What to consider when sizing running, formal, and casual shoes
- Why afternoon fittings give you a truer shoe size
- How to read a shoe size label correctly
- How to measure a child’s feet properly
- What actually matters most when sizing your feet
- Sources
How to measure your shoe size with the paper tracing method
This is the method podiatrists tend to describe when people ask how to determine shoe size without any special equipment. It takes about five minutes and needs almost nothing you don’t already own.
You’ll need a sheet of plain paper larger than your foot, a pen or pencil, a ruler or tape measure, a hard floor, and the socks you actually plan to wear with the shoes. Skip anything with a cushioned pile. A rug or carpet will absorb the edge of your foot and give you a trace that’s smaller than reality, which is one of the most common reasons people end up buying shoes half a size too tight.
Timing matters more than most people realise. Feet swell over the course of the day from gravity and normal fluid movement, so a measurement taken at 7am can read noticeably smaller than one taken at 7pm. Measure in the late afternoon or evening if you want a number that holds up when you’re actually wearing the shoes out and about.
Here’s the step-by-step process:
- Tape the paper to the floor at the corners so it can’t slide while you’re standing on it.
- Stand on the paper with your full body weight distributed evenly across both feet, as if you were queuing rather than balancing.
- Hold the pen or pencil completely vertical against your skin and trace the outline of your foot, keeping the tip snug against your foot the whole way round.
- Mark the very back of your heel and the tip of your longest toe clearly on the paper.
- Lift your foot away and measure the straight-line distance between those two marks in centimetres, using a ruler rather than trying to follow the curve of the trace.
- Repeat the entire process for your other foot on a fresh sheet.
- Compare both numbers and record the larger one. Most people have a size difference between their two feet, and Shoe Carnival’s fitting guidance notes it’s common to see a 2 to 5 millimetre gap between left and right.
The three mistakes that ruin this method every time: tracing on carpet, angling the pen inward or outward as you go (which shrinks the outline), and measuring first thing in the morning or while sitting down, both of which understate your true foot length.
Pro Tip: Do the trace twice for each foot and check the two readings match within a couple of millimetres. If they don’t, your pen probably wasn’t vertical the first time round, or the paper slipped.
The wall-baseline method for a faster single-person measurement
Tracing is thorough, but it’s fiddly if you’re on your own or short on time. The wall-baseline method gets you a length reading in under a minute and works well as a way to measure your shoe size when you just want a quick, sanity-check number.
- Place a ruler or tape measure flat on a hard floor with the zero end pushed right up against a skirting board or wall.
- Press your heel firmly into the corner where the wall meets the floor, standing upright with your weight on that foot.
- Read off the measurement at the point where your longest toe ends.
- Repeat for the other foot and, as always, use the larger figure.
It’s a genuinely useful option when you don’t have a second person to help hold paper steady, or when your only hard flooring is in a narrow hallway where a full trace is awkward. Anyone shopping alone late at night before an online order, for instance, will find this quicker than hunting down tape and a pencil.
Once you’ve got your baseline length, getting your width takes only a moment longer. If you did a paper trace, look at the trace itself and find the widest point across the ball of your foot, roughly where your toes meet the rest of your foot. Measure straight across that point in centimetres. If you used the wall method instead and skipped the trace, wrap a flexible tape measure or use callipers across that same widest point while standing on the foot, since weight-bearing spreads the foot slightly wider than it sits unweighted.
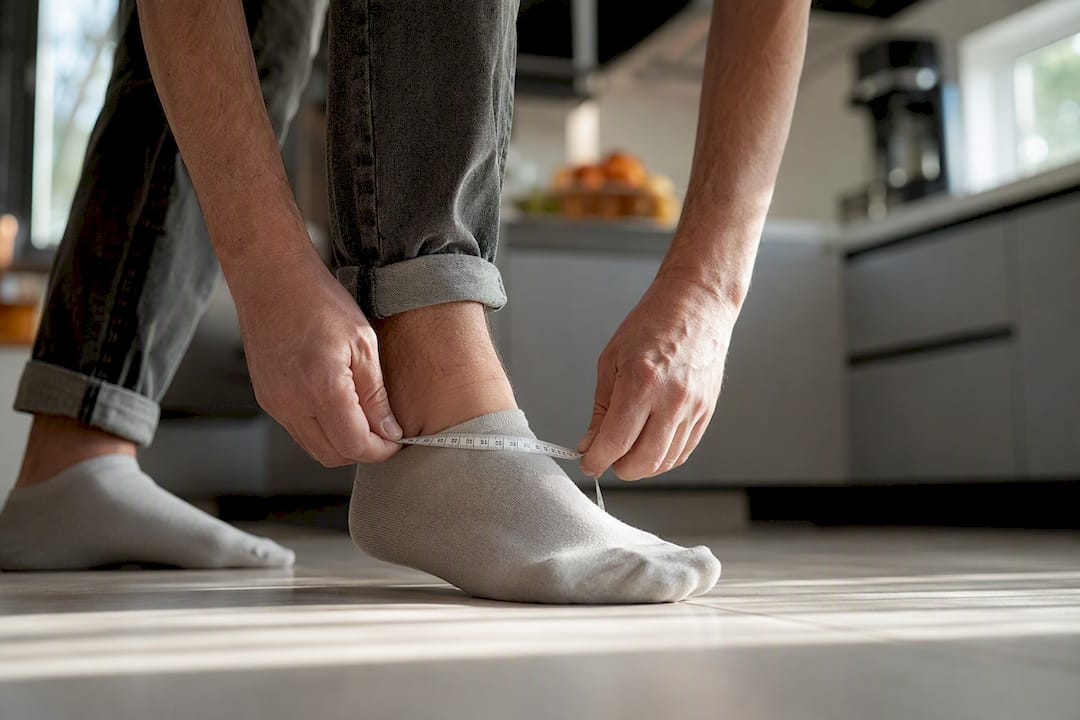
Both length and width numbers matter. A shoe can be the right length and still feel wrong if the width is off, which is exactly what the next section covers.
Measuring foot width and understanding arch length
Width gets overlooked constantly, yet it’s often the reason a “correctly sized” shoe still pinches. Once you’ve got your ball-of-foot measurement in centimetres, you can convert it into the width letters printed on shoe boxes.
- Narrow widths sit around B for women’s sizing and roughly the equivalent for men’s
- Standard width is typically D
- Wide sits at E, with EE marking extra wide
Each letter step represents roughly a 6 millimetre, or quarter-inch, jump in ball width, and the same letter means a different actual measurement depending on your shoe length. A D-width in a size 6 is narrower in real terms than a D-width in a size 10, so never assume a letter transfers cleanly between sizes.
Arch length is the measurement most home shoppers have never heard of, and it’s the one that saves people with longer arches from years of ill-fitting shoes. It’s measured from your heel to the ball of your foot, rather than to your longest toe. Podiatry guidance on Brannock devices is clear that when your arch length is longer than your heel-to-toe length, the arch measurement should be the one you size against, because otherwise the widest part of your foot sits in the wrong part of the shoe and causes pressure or discomfort along the top.
If your length and width readings genuinely conflict, the fix is usually one of three things: size up half a size and add a thin insole to take up the extra room, or look for a dedicated wide-fit version of the shoe rather than forcing a standard width.
Converting your measurement to UK, EU, and US shoe sizes
Take the larger of your two foot-length measurements in centimetres and read it across a size-conversion chart. That’s the whole process for finding your equivalent UK, EU, or US size, though a few quirks are worth knowing before you check out.
EU sizing runs on a different scale entirely to UK and US sizing, based on the length of the shoe’s last in Paris points rather than inches, so an EU 40 doesn’t sit at a tidy round number when converted. US sizing also differs from UK sizing by roughly a full size in most systems, and men’s and women’s US scales aren’t interchangeable, so always check which chart you’re reading.
If your measurement lands between two sizes on the chart, round up rather than down. A shoe that’s a touch roomy is far more comfortable over a full day than one that’s a fraction too tight, and WikiHow’s sizing guidance makes the same call for anyone stuck between two options.
Every brand cuts its lasts slightly differently, so treat a generic chart as a strong starting point rather than gospel. YDA’s own conversion chart guide has printable UK, EU, and US tables you can keep handy, and the men’s foot size chart breaks conversions down further if you’re buying for a male foot specifically. For anyone working primarily in US sizing, the US shoe size conversion guide covers the scale in more detail.
How do you check if new shoes actually fit?
Getting the size number right is only half the job. Once the shoes arrive, run through a proper fit check before you decide the size is correct.
- You should be able to fit roughly a thumb’s width of space between your longest toe and the front of the shoe
- Your heel should sit snugly in place with no slipping when you walk
- The widest part of your foot should line up with the widest part of the shoe, not sit ahead of or behind it
- There should be no pinching, rubbing, or pressure points anywhere across the top or sides
If the shoe feels too narrow, don’t just tolerate it and hope it stretches. Try a wide-fit version of the same style first, or go up half a size and use a thin insole to take up the extra volume. If the shoe feels too long instead, a supportive insole or a heel grip at the back will often solve the problem without needing to exchange the pair.
Persistent pain that doesn’t resolve with any of these adjustments, or a medical condition affecting your feet such as diabetes or a diagnosed foot deformity, is a sign to get a professional fitting rather than keep guessing. A podiatrist or a specialist fitter can check your feet properly and, where needed, recommend orthotics.
Pro Tip: Do your fit check standing up and walking a few steps, not just sitting with the shoe on. Pressure points that feel fine while seated often show up the moment your full weight goes through the shoe.
Foot health expertise behind this shoe sizing guide
Getting this right matters more than a lot of people assume, and it’s something Panagiotis has written about repeatedly across YDA UK’s foot health guides, precisely because the consequences of getting it wrong go beyond mild discomfort. Feet subjected to years of a badly fitting size are a well documented contributor to bunions, calluses, and nerve irritation.
Feet also aren’t static. They change with age, weight fluctuation, and activity level, which is why a measurement taken five years ago shouldn’t be trusted for a purchase today. As a working rule:
- Re-measure once a year even if nothing feels different
- Re-measure straight away if you’ve gained or lost a noticeable amount of weight, or significantly changed your activity level
- Always re-measure before buying performance or medically-oriented footwear, where the margin for error is much smaller
If you want to go deeper than this guide, YDA UK’s home measurement walkthrough and the step-by-step foot measurement page both cover the process with more visual detail, alongside the conversion charts already mentioned.
Why the longest toe isn’t always your big toe
Most people assume their big toe marks the front edge of their foot, and for a meaningful share of the population, it doesn’t. The second toe is longer than the big toe often enough that podiatrists have a name for it, sometimes called Morton’s toe, and if you’re one of these people and you measure only to your big toe, you’ll buy shoes that are too short.
This is why every proper measurement instruction specifies measuring to your longest toe rather than your big toe by default. Michigan Foot Doctors’ guidance on foot measurement is explicit that the longest toe may not be the big toe, and skipping this check is one of the most common reasons people end up with shoes that crush their toes within the first few wears.
Checking is simple. Look down at your bare foot, or better still, look at a paper trace once you’ve done one. Compare the tip of your big toe against the tip of your second toe and see which one extends furthest. For some people it’s obvious at a glance. For others the difference is only a millimetre or two, which is exactly why it’s worth confirming with an actual measurement rather than assuming.
If your second toe is the longest, mark that toe’s tip on your trace, not your big toe’s, before you take your heel-to-toe measurement. It’s a thirty-second check that prevents a genuinely common sizing mistake, and it costs nothing to do while you’ve already got the paper and pen out.
Does your shoe size change with age, pregnancy, or swelling?
Yes, and more than most people expect. Feet aren’t fixed for life. The arches naturally flatten and the ligaments that hold the foot’s structure together loosen gradually with age, which tends to make feet slightly longer and wider over the decades rather than staying the same shape from your twenties into your sixties.
Pregnancy is a more dramatic version of the same mechanism. Hormonal changes relax ligaments throughout the body, feet included, and the extra weight carried through the final trimester can flatten the arch further. Many people find their shoe size genuinely increases during pregnancy, and for some, it never fully returns to the pre-pregnancy measurement afterwards.
Swelling is the short-term version of the same problem. Long flights, hot weather, standing for extended shifts, and certain medical conditions all cause fluid to pool in the feet and ankles, temporarily increasing both length and width. This is part of why measuring in the evening rather than the morning gives you a more realistic number: it captures your feet closer to their largest natural state rather than their most compressed.
The practical takeaway is straightforward. Don’t treat your shoe size as a fixed fact you learned once and never need to check again. If you’re pregnant, recovering from an injury, or simply haven’t measured in a few years, take five minutes and do it again before your next purchase.
Why shoe sizes differ so much between brands
A size 8 in one brand can feel like a size 7.5 or a size 9 in another, and this isn’t inconsistency for its own sake. Every brand designs its shoes around its own “last”, the foot-shaped mould used to construct the shoe, and lasts vary in shape, volume, and proportion between manufacturers even when the printed size label matches.
Running brands tend to size closer to true measurement because performance fit matters so much for that category, while some fashion and dress shoe brands run narrower or shorter than their labelled size to suit a sleeker aesthetic. Sports brands built around wider forefoot volume, meanwhile, can run generously compared with brands that favour a narrower toe box.
This is precisely why a generic conversion chart, however accurate, should be treated as a starting point rather than a final answer. Your centimetre measurement gets you into the right neighbourhood, but a brand’s own specific size chart is what confirms the exact number for that particular shoe. If you’ve previously found that one brand consistently runs a half size small or large on you, factor that adjustment in every time you order from them, regardless of what a universal chart suggests.
The safest approach when trying an unfamiliar brand for the first time is to check their specific chart against your measured centimetre length rather than relying on your usual size from a different brand. It takes an extra minute and avoids an unnecessary exchange.
What to consider when sizing running, formal, and casual shoes
The right amount of room in a shoe isn’t fixed. It shifts depending on what the shoe is actually for, which is why the same person can legitimately need different sizes across their shoe collection.
Running shoes need the most extra space of any category. Feet swell measurably during exercise and lengthen slightly with each stride’s impact, so a snug fit at rest becomes painfully tight after a few kilometres. Many people size up half a size specifically for running shoes compared with their everyday casual size, leaving that little bit of extra room at the toe for natural swelling and forward foot movement inside the shoe.
Formal shoes sit at the opposite end. Dress shoes and formal footwear are generally worn for shorter, less physically demanding periods, so a closer, more precisely fitted size is appropriate and often intentional in the design. Too much extra room in a formal shoe causes heel slip and looks sloppy, so stick close to your actual measured size rather than sizing up out of habit.
Casual everyday shoes sit somewhere in the middle. A little breathing room is sensible since these shoes get worn for long stretches, standing and walking through an ordinary day, but you don’t need the same generous allowance a running shoe demands.
Health-oriented and performance footwear, of the kind that prioritises foot support and energy return, deserves particular care with sizing since the technology inside the shoe is designed to interact precisely with the structure of your foot, and an incorrect size undermines the benefit it’s built to provide.
Why afternoon fittings give you a truer shoe size
If you’ve ever bought shoes that felt perfect in the shop at 10am and uncomfortably tight by 6pm the same day, this is almost certainly why. Feet expand gradually over the course of a normal day as gravity pulls fluid downward and the tissues in the foot respond to hours of standing, walking, and weight-bearing.
The difference between a morning foot and an evening foot isn’t trivial. It can be enough to shift you into a different size bracket entirely, particularly for anyone who spends much of the day on their feet or in warm conditions. Buying shoes based on a morning measurement or a morning try-on session means you’re sizing for your smallest possible foot of the day, which is precisely the wrong moment to base a purchase on.
The fix is simple and costs nothing: measure your feet, and try shoes on, in the late afternoon or evening whenever possible. If you’re shopping in person, an afternoon or early evening visit gives you a far more honest sense of how the shoe will feel during the hours you’ll actually be wearing it. If you’re buying online, take your measurement at the same time of day for the same reason, and reference that reading rather than a rushed morning check.
This single timing adjustment resolves more sizing complaints than almost any other piece of advice in this guide, and it takes no extra effort. Just measure later in the day.
How to read a shoe size label correctly
Shoe boxes carry more information than most shoppers actually read, and misreading the label is a surprisingly common source of ordering mistakes, particularly when buying internationally.
Most labels print multiple size systems side by side, typically UK, EU, and US, sometimes alongside a centimetre measurement in brackets. The trap is picking the wrong column, especially when a UK and US number look plausible for the same foot but actually refer to entirely different sizes. Always double check which abbreviation you’re reading, since a label showing “UK 6 / EU 39 / US 8” refers to one single size across three naming systems, not three different options.
Labels also often separate men’s and women’s sizing even on unisex-styled shoes, so a size printed for “women’s” won’t match the same number on a “men’s” scale. If a label only shows one gendered scale and you’re shopping across that line, use a proper cross-gender conversion rather than assuming the number transfers directly.
Width is sometimes printed on the label too, usually as a single letter following the size number, such as “8 D” or “7.5 EE”. If no width letter appears at all, the shoe is almost certainly built to a standard medium width by default.
Finally, check whether the label states the measurement in centimetres alongside the size number. When it does, that centimetre figure is the most reliable number on the entire label, since it removes any ambiguity between sizing systems altogether. Match it directly against your own measured foot length for the most dependable read.
How to measure a child’s feet properly
Children’s feet grow fast enough that a shoe bought comfortably in September can be pinching by the following spring, which makes correct measurement even more important than it is for adults. The same paper tracing or wall-baseline methods work perfectly well for children, but a few extra details matter.
Measure both feet every single time, since growth is rarely perfectly symmetrical in children and one foot outgrowing the other slightly is common. Always measure standing up with full weight on the foot, just as with adults, since a seated measurement of a child’s foot understates the true length even more noticeably than it does for an adult foot.
Leave a little extra growing room rather than sizing to an exact match. A gap of roughly a thumb’s width, similar to the adult fit check, between the longest toe and the end of the shoe gives room for a few months of growth without the shoe being so loose that it affects how the child walks or runs.
Re-measure far more often than you would for yourself. Younger children’s feet can grow enough to need a new size within three to four months, so checking every couple of months during fast growth phases, rather than waiting for a child to complain, catches the change before it causes discomfort or affects how they walk. Watch for signs a shoe has become too small even between scheduled checks, such as a child pulling at their shoes, red marks across the toes at the end of the day, or a sudden reluctance to wear a previously favourite pair.
What actually matters most when sizing your feet
The conventional shoe-fitting advice you’ll find scattered across most retail sites treats length as the whole story and width as an afterthought, if it’s mentioned at all. That’s backwards. In our view, width and arch length cause more real-world fit complaints than a length measurement being slightly off, particularly for anyone with a wider forefoot or a longer arch than the average last a brand designs around.
The other gap in typical advice is timing. Plenty of guides mention measuring in the evening as a minor tip buried near the bottom of the page, when it should arguably be the first instruction, not the last. A morning measurement paired with an afternoon wear pattern is a mismatch built into the purchase before the shoe even arrives.
If you take one thing from this guide, prioritise this order: measure late in the day, check width alongside length, and confirm your arch length if your feet run long and narrow. Everything else, brand charts, rounding rules, width letters, only works properly once those three fundamentals are right. Getting them right matters even more for performance and health-focused footwear, where the technology built into the shoe depends on it actually sitting where your foot needs it.
— Panagiotis
Sources
- How to measure foot size | Michigan Foot Doctors
- Brannock device fitting tips
- How to properly measure feet for shoe size | Parkway Podiatry
- How to measure shoe size at home | Shoe Carnival