
Step by step shoe cleaning: your complete 2026 guide
TL;DR:
- Proper shoe cleaning involves using material-specific tools and pH-balanced agents to prevent damage and extend shoe lifespan. Dry brushing and careful drying in shaded areas are essential steps to maintain shoe shape and avoid deterioration. Regular, gentle cleaning preserves shoes’ appearance and structural integrity over time.
Step by step shoe cleaning is the methodical process of removing dirt and stains from shoe materials using the correct tools and agents to preserve both appearance and lifespan. Leather, suede, canvas, and mesh each respond differently to water, detergents, and brushing pressure. Using the wrong technique on the wrong material causes permanent damage. This guide walks you through every stage of the process, from gathering your kit to drying correctly, so your shoes come out cleaner and last longer.
What tools and products do you need to start step by step shoe cleaning?
The right toolkit makes the difference between a clean shoe and a damaged one. Attempting to clean shoes with a single all-purpose cloth and washing-up liquid is the most common mistake people make. Effective shoe maintenance requires purpose-built tools matched to each material.
Essential tools to gather before you start:
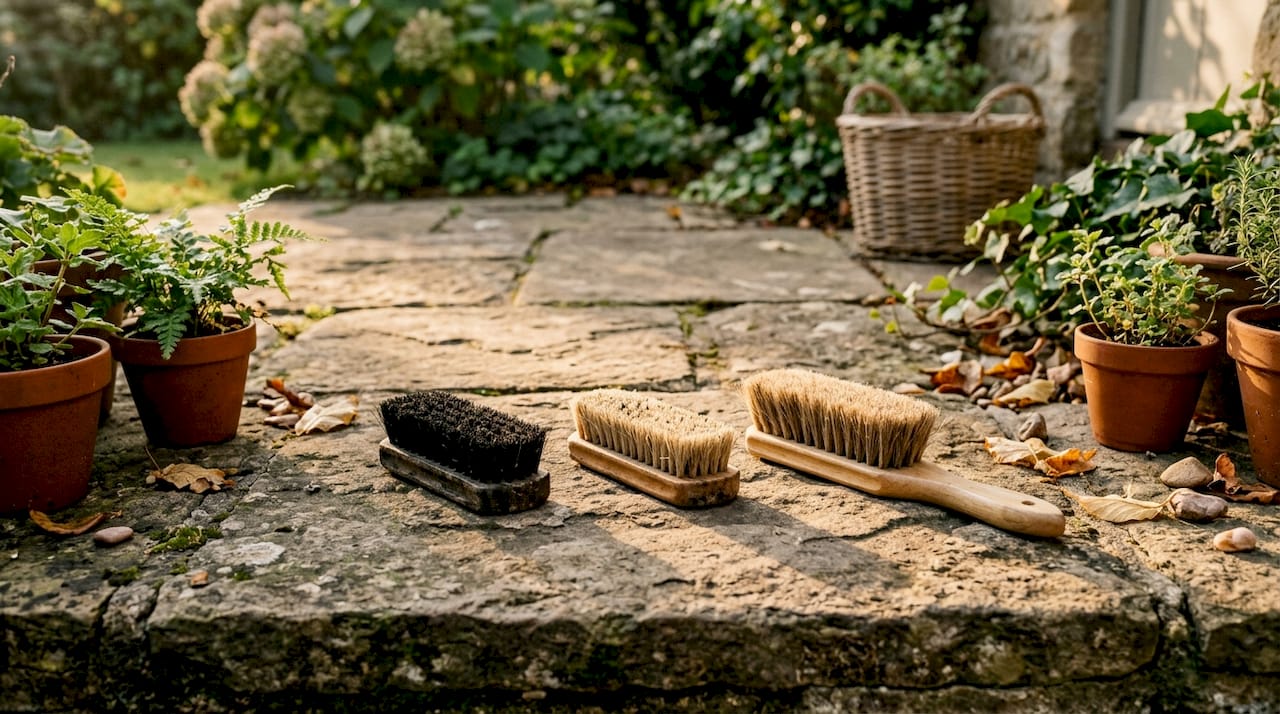
- A stiff-bristle brush for outsoles and heavily soiled rubber
- A medium-bristle brush for canvas and synthetic uppers
- A soft horsehair brush for leather and suede
- Microfibre cloths for applying and removing cleaning solutions
- A suede eraser for dry stain removal on napped materials
- A small bowl for mixing cleaning solutions
- Old newspaper or shoe trees for drying
Proper shoe cleaning requires at least three specialised brushes: stiff for outsoles, medium for canvas, and soft horsehair for delicate leather and suede. Each brush type protects the material it contacts while maximising cleaning power.
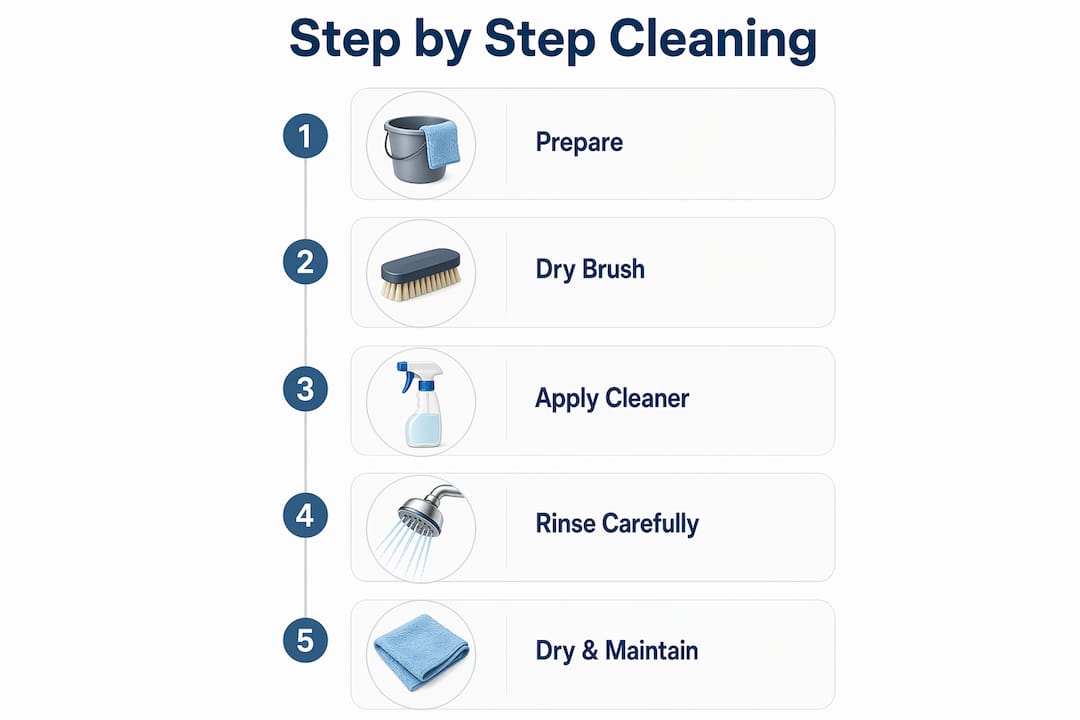
For cleaning agents, mild detergent combined with bicarbonate of soda handles the vast majority of routine trainer stains without harsh chemicals. Bicarbonate of soda’s natural deodorising and gentle abrasive properties make it ideal for common trainer cleaning tasks. For leather, a dedicated leather cleaner and conditioner is non-negotiable. For suede, a dry-clean spray or suede shampoo works far better than any liquid detergent.
pH matters more than most people realise. Standard alkaline laundry detergents with a pH above 10 degrade polyurethane adhesives drastically, reducing their structural lifespan from 12 years to under 5 months. Always choose a pH-balanced or mildly acidic cleaner for any shoe with glued construction.
Pro Tip: Build a dedicated shoe cleaning kit in a small plastic box. Keep it stocked with your brushes, a microfibre cloth, bicarbonate of soda, and a pH-balanced cleaner. Having everything in one place removes the friction that stops people cleaning their shoes regularly.
How to clean shoes effectively step by step based on material type
Preparation is the same for every shoe type. Remove the laces and insoles before you do anything else. Laces should be soaked separately in warm water with a small amount of mild detergent. Insoles benefit from a light scrub with a soft brush and bicarbonate of soda, then left to air dry completely.
Dry brushing before any liquid application removes loose dirt effectively. Introducing water to dry, caked-on dirt only embeds the grime deeper into the material. Always dry brush first, regardless of shoe type.
Always perform a patch test before applying any cleaner to the full shoe. Apply a small amount to an inconspicuous area and wait five minutes. This simple patch test prevents colour damage and material harm before it can spread across the whole upper.
Leather shoes: controlled moisture and conditioning
- Dry brush the upper with a soft horsehair brush to remove surface dust and dirt.
- Mix a small amount of mild, pH-balanced leather cleaner with water.
- Dampen a microfibre cloth lightly. Never saturate it.
- Wipe the leather in small circular motions, working section by section.
- Remove any cleaner residue with a clean, damp cloth.
- Apply a leather conditioner while the shoe is still slightly damp to lock in moisture.
- Buff with a dry cloth to restore the finish.
Leather dries out and cracks when cleaned too aggressively or too often with liquid. Conditioning after every clean is not optional. It restores the oils that cleaning strips away.
Suede shoes: dry methods first, moisture last
- Use a suede brush to lift the nap and dislodge surface dirt with short, firm strokes.
- Work a suede eraser over scuffs and dry stains in a back-and-forth motion.
- For stubborn wet stains, blot with a barely damp cloth. Do not rub.
- Allow the shoe to dry completely, then re-brush the nap to restore texture.
Suede is the most moisture-sensitive material in footwear. Even a small amount of excess water causes tide marks that are extremely difficult to remove. Treat suede with the least liquid possible.
Canvas shoes: spot treatment then full wash
- Dry brush the canvas to remove loose dirt.
- Mix mild detergent with warm water and a teaspoon of bicarbonate of soda.
- Apply the solution to stained areas with a medium brush using circular scrubbing motions.
- Work across the full upper once spot stains are treated.
- Wipe away the solution with a clean, damp cloth.
- Repeat if staining persists.
Canvas handles moisture better than leather or suede, but avoid soaking the shoe through to the insole. Wet internal foam takes a long time to dry and can develop mould if left damp.
Mesh and knit shoes: foam over water
Mesh and knit uppers are the most delicate to clean. Never submerge glued shoes in water. Water saturation infiltrates porous foam and adhesives, causing weakening and structural degradation. Use a foam-based cleaner applied with a soft brush instead. Work the foam into the mesh with light, circular strokes, then wipe away with a microfibre cloth.
Common stains and targeted fixes:
- Mud: Let it dry completely, then dry brush before any liquid treatment.
- Oil: Apply a small amount of bicarbonate of soda directly to the stain, leave for 15 minutes, then brush away.
- Grass: Dab with a cloth dampened with a mild detergent solution. Do not scrub.
- Ink: Use a cotton bud with a small amount of rubbing alcohol on leather only. Test first.
Pro Tip: For mesh shoes, a foam cleaner applied with a soft toothbrush gives you precise control over where moisture goes. It cleans effectively without saturating the material beneath.
What are the best techniques for drying and maintaining shoes after cleaning?
Drying is where most people undo good cleaning work. The instinct to speed up drying with a radiator or direct sunlight is understandable but damaging. UV radiation accelerates oxidative degradation in EVA foam midsoles, and direct heat causes yellowing and material stiffening across almost every shoe type.
Best drying practices:
- Stuff shoes with crumpled newspaper or paper towels immediately after cleaning. This absorbs internal moisture and holds the shoe’s shape as it dries.
- Place shoes in a shaded, well-ventilated area indoors. A spot near an open window works well.
- Never use a tumble dryer, hairdryer, or place shoes on a radiator.
- Allow at least 24 hours before wearing cleaned shoes again.
- Dry insoles and laces separately and flat. Laces can be rolled in a towel to remove excess moisture first.
Once shoes are fully dry, apply a protective spray suited to the material. Waterproofing sprays for suede and canvas create a barrier against future staining. Leather benefits from a light wax or cream polish applied after conditioning.
Correct storage after cleaning extends the time between necessary cleans. Store shoes in a cool, dry place away from direct light. Shoe trees maintain shape in leather footwear and prevent creasing. For long-term storage, breathable cotton bags protect against dust without trapping moisture. For a full shoe maintenance workflow, combining proper drying with correct storage is the single most effective way to extend shoe lifespan.
Pro Tip: Replace newspaper stuffing after two hours if the shoes are very wet. The paper becomes saturated quickly and stops absorbing moisture effectively.
What common mistakes should you avoid in shoe cleaning?
Most shoe damage happens not from wear but from incorrect cleaning. Knowing what not to do is as important as knowing the right technique.
- Over-wetting the shoe. Over-saturating shoes causes stiffening, discolouration, and material degradation, particularly in leather and suede. The principle of ‘less is more’ in liquid use is the most consistent advice from industry professionals.
- Skipping the dry brush phase. Dry brushing before any liquid application is not optional. Skipping it pushes surface dirt deeper into the material when liquid is applied.
- Using harsh detergents. Standard laundry detergents are too alkaline for shoe construction. They degrade adhesives and fibres rapidly.
- Skipping the patch test. Applying a new cleaner directly to the full shoe without testing risks permanent colour damage.
- Machine washing glued shoes. Machine washing exerts damaging shear forces and heat that are unsuitable for most athletic or glued shoes. Hand cleaning remains the safest method for any shoe with bonded construction.
- Scrubbing too hard. Excessive force with a stiff brush on delicate materials like suede or knit causes fibre damage that cannot be reversed.
Textile chemistry confirms that shoe fibre stability depends on controlled pH and temperature. Any deviation from mild, neutral conditions leads to rapid fibre damage and adhesive failure. The safest cleaning approach is always the gentlest one that still gets the job done.
For more on maximising shoe durability, the principles of controlled moisture and pH-appropriate cleaners apply across every material type.
Key takeaways
Effective shoe cleaning requires material-specific techniques, pH-balanced cleaning agents, and controlled moisture at every stage.
| Point | Details |
|---|---|
| Match tools to material | Use stiff brushes for outsoles, medium for canvas, and soft horsehair for leather and suede. |
| Always dry brush first | Removing loose dirt before applying liquid prevents grime from embedding deeper into the material. |
| Choose pH-balanced cleaners | Alkaline detergents above pH 10 degrade adhesives rapidly; always use mild, neutral solutions. |
| Dry away from heat and sunlight | Air dry in a shaded, ventilated space to prevent yellowing, stiffening, and UV damage to foam. |
| Patch test every new product | Testing on a hidden area for five minutes prevents irreversible colour damage to the full shoe. |
Why I think most people are cleaning their shoes wrong
People tend to treat shoe cleaning as a single task rather than a material-specific process. I have seen leather shoes scrubbed with the same stiff brush used on rubber outsoles, and suede treated with a soaking wet cloth. The results are predictable: cracked leather, tide-marked suede, and shoes that look worse after cleaning than before.
The shift that makes the biggest difference is investing in the right brushes. Three brushes covering stiff, medium, and soft horsehair covers almost every shoe type you will own. That is a one-time purchase that pays back every time you clean a pair correctly instead of damaging them.
The other thing I have come to believe strongly is that drying matters as much as cleaning. Most people rush this stage. Stuffing shoes with newspaper and leaving them in a ventilated room overnight is not exciting advice, but it is the step that preserves shape and prevents the stiffening that makes shoes unwearable. Good footwear care for athletes and everyday wearers alike comes down to patience more than any product.
— Panagiotis
Ydauk shoes: built to reward proper care
Shoes built with advanced materials and foot health technology respond exceptionally well to the cleaning methods described here.

Ydauk designs its footwear around YDA Technology, which combines foot health principles with materials engineered for durability and everyday performance. Shoes built to this standard hold their structure and appearance longer when cleaned correctly with pH-balanced agents and controlled moisture. Harsh chemicals and over-wetting are the fastest way to shorten the life of any high-performance shoe. Cleaning your Ydauk footwear using the stepwise methods in this guide protects the technology built into every pair. Explore the full range of YDA shoe technology to understand what makes these shoes worth maintaining properly.
FAQ
What is the safest way to clean leather shoes at home?
Use a soft horsehair brush, a pH-balanced leather cleaner, and a lightly dampened microfibre cloth. Always follow with a leather conditioner to restore moisture stripped during cleaning.
Can I put my trainers in the washing machine?
Machine washing exerts shear forces and heat that damage adhesives and foam in most athletic shoes. Hand cleaning with a soft brush and mild detergent is the safest and most effective method.
How do I remove mud from shoes without damaging them?
Let the mud dry completely before touching it. Dry brush the hardened mud away, then treat any remaining stain with a damp cloth and mild detergent solution.
How often should I clean my shoes?
Light brushing after each wear removes surface dirt before it embeds. A full clean using material-specific methods every two to four weeks keeps most shoes in good condition.
Does bicarbonate of soda really clean trainers?
Mild detergent combined with bicarbonate of soda effectively cleans routine trainer stains without harsh chemicals. Its gentle abrasive action and natural deodorising properties make it one of the most practical household cleaning agents for canvas and synthetic uppers.